Blog

  • A Complete Guide to Temperature Mapping in Pharmaceutical Facilities

    A Complete Guide to Temperature Mapping in Pharmaceutical Facilities

    Introduction

    What comes to your mind when you think about the requirements of the pharmaceutical industry? You must have thought about hygiene and cleanliness. 

    You’re not wrong. It is one of the biggest criteria, but did you know that the right temperature is also important?

    Having the correct temperature while the products are being made is a very important requirement. A lot of medicinal products and other biological products are sensitive to temperature.

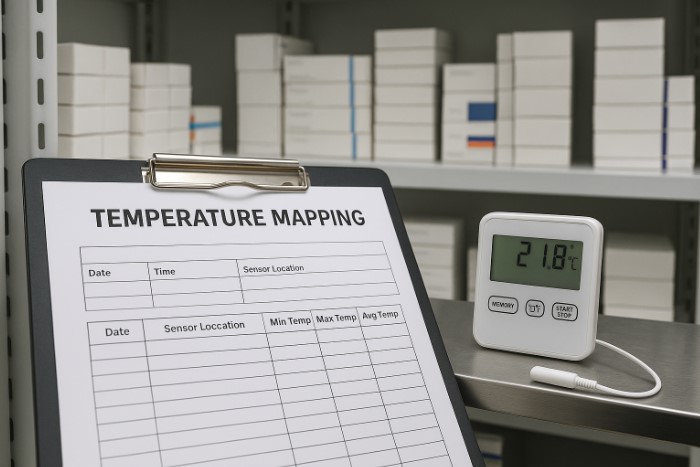
    To make sure that the temperature stays within the required and recommended range, temperature mapping is used. It makes sure that every part of your required area stays within the required temperature.

    Mapping of temperature is also a part of Good Manufacturing Practices (GMP) and Good Distribution Practices (GDP).

    What Is Temperature Mapping?

    A temperature mapping is a technique that informs about the uniformity of the distribution of temperature within a controlled area.

    It works by using a range of multiple sensors placed around a space (such as a warehouse, cold room, or fridge) to build a map of when and why the temperature in certain areas gets warmer or cooler than it’s supposed to.

    These aren’t just temperature spot checks. You’re tracking real data across time and space to make sure no product ends up in a “hot” or “cold” zone that could make it unwanted.

    It’s used everywhere, from massive distribution warehouses to tiny benchtop fridges. If a space stores temperature-sensitive products, mapping is the first step to making sure it’s suitable.

    Why Temperature Mapping Matters

    If you’re working in pharma, you already know that temperature excursions can spell disaster. For things like biologics and vaccines, even short exposure to out-of-range conditions can break down efficacy.

    But it’s not just about product safety; it’s also a compliance thing. Regulators expect proof that your storage spaces are up to the job, not just good intentions.

    What Do the Regulations Say?

    You can’t talk about validation without touching on regulations. And when it comes to temperature mapping, the expectations are crystal clear:

    AuthorityWhat They Expect
    WHO (TRS Annex 9)Mapping before first use, re-map every 2–3 years or after changes
    FDA (21 CFR 211)Prove that environmental conditions won’t affect product quality
    USP <1079.4> (draft)Establishes best practices for mapping vs. monitoring
    GDP, EMA, MHRAExpect documented qualification of all storage spaces

    How to Perform a Temperature Mapping Study

    Let’s break it down step by step.

    a. Create a Protocol

    Before you hang a single sensor, start with a plan. Your protocol should include:

    • The goal of the study
    • The space being mapped.
    • What temperature range are you validating for (e.g., 2–8°C)
    • How long the study will run (48–72 hours is common)
    • Where sensors will go, and how many you’ll use
    • Calibration details for every sensor

    Think of it as the blueprint for the whole study.

    b. Choose the Right Number and Placement of Sensors

    You don’t want to under-sample. More sensors = better visibility. Here’s a rough guide:

    Sensor PlacementWhy It Matters
    High/mid/low levelsTemperatures stratify vertically
    Corners and centerCatch edge effects or thermal layering
    Near doors and ventsDetect external temperature influences
    Inside racks or storage binsReal conditions where products live
    One sensor per 5–10 m²Adjust based on layout and risk

    c. Run the Study

    Once everything is set, deploy the sensors and let the study run uninterrupted. Keep the doors shut as much as possible unless you’re testing door-open scenarios.

    For large facilities or ones exposed to seasonal swings, you might want to map in both summer and winter to get worst-case data.

    Keep an event log, too. If anything unusual happens (power outage, door jammed open), note it. It’ll help explain any anomalies later.

    d. Analyze and Report

    Now comes the fun part: turning data into insight.

    • Look at min/max temperatures per sensor.
    • Identify any hot or cold spots.
    • Use graphs or heatmaps to visualize the spread.
    • Calculate Mean Kinetic Temperature (MKT) if applicable.
    • Compare everything to your acceptance criteria.

    Another WHO case saw a cold room fail mapping because the temperature controller range was too wide. By adjusting the setpoint, the room stabilized, and a second mapping confirmed it was back within spec.

    All findings should go into a formal report. Include everything from sensor positions and raw data to conclusions and any corrective actions.

    Best Practices for Successful Mapping

    Here’s what we’ve learned over the years:

    • Don’t skimp on sensors. More data is better.
    • Calibrate every sensor. No shortcuts here.
    • Map under real conditions. Loaded vs. empty, door-open scenarios, seasonal swings.
    • Map before first use, and again after changes. New cooling unit? Re-map it.
    • Document everything. Your protocol, calibration certificates, raw logs, and final report.

    Oh, and use the data to guide where you place your permanent monitoring probes. It’s a smart way to future-proof your setup.

    Conclusion

    Monitoring tells you if your system is staying in range today.

    It’s your proof that the space was qualified before the first product ever hit the shelf. And it’s your safety net against hidden risks, like the “perfect-looking” cold room that’s quietly cooking one corner.

    So if you’ve just commissioned a new facility, replaced a cooling system, or haven’t mapped in years, it’s time.

    Start with a protocol. Use trusted loggers. Map it, analyze it, and make sure your storage areas are as controlled as they look on paper.

    Temperature mapping isn’t just a task; it’s your best insurance policy.

  • Ensuring Quality Through Process Validation: Best Practices for Pharmaceutical Compliance

    Ensuring Quality Through Process Validation: Best Practices for Pharmaceutical Compliance

    Introduction 

    Quality is something that we expect to be in everything we use, be it the food we eat or the clothes we wear. But if we talk about the medicines we consume and the pharmaceuticals, quality is something that needs to be there from the very beginning, and not just in the end product. 

    There needs to be high standards of safety and efficacy in every step and procedure of pharmaceutical manufacturing. To make sure all the standards of safety and quality are met, process validation comes in.

    Pharmaceutical manufacturing goes through a lot of tests to ensure its quality. This process validation means proving that every step in the process delivers top quality.

    Now, process validation has evolved into a journey. It has become a cycle of understanding and improving. 

    This whole process teaches you something new every day and helps you improve your systems so that you are coming up with the best quality product every single time.

    Through this article, let’s understand how to ensure quality through process validation.

    1. What Is Process Validation and Why Does It Matter

    Process validation works as the proof that your manufacturing process works. It’s the scientific evidence that shows you can produce a product that meets all the specifications.

    It connects development knowledge with commercial reliability and protects both patients and manufacturers.

    If validation fails, there can be severe consequences.

    2. Global Regulatory Framework

    RegulatorKey FocusHighlights
    FDA (U.S.)3-Stage Lifecycle ApproachStage 1: DesignStage 2: Qualification (PPQ)Stage 3: Continued Process Verification (CPV)
    EMA (EU)Annex 15: Lifecycle + Risk ManagementValidation Master Plan (VMP) required; no retrospective validation
    WHO / ICHGlobal HarmonizationPromotes Quality by Design (QbD) and continuous verification

    All major regulators focus on a lifecycle model. They are now moving away from “three batches and done” toward continuous evidence of control.

    In one 2025 FDA warning, a company with unvalidated blending steps was ordered to do its entire process validation program again before distribution.

    3. Understanding the Process Validation Lifecycle

    Let’s understand the process validation life-cycle in a better way:

    StageObjectiveKey Deliverables
    Stage 1 – Process DesignDefine and understand the processCQAs, CPPs, risk analysis, control strategy
    Stage 2 – Process Qualification (PPQ)Demonstrate process consistencyIQ/OQ/PQ, PPQ batches, analytical results
    Stage 3 – Continued Process Verification (CPV)Maintain control during routine productionCPV reports, trend charts, CAPA actions

    Stage 1: Process Design

    This is the initial stage of the whole process. Here, you understand your product and design the whole process of how it is going to turn out.

    You start by identifying what defines quality. It is called Critical Quality Attributes (CQAs). You also identify the parameters that influence the quality – the Critical Process Parameters (CPPs).

    Here, you use tools like Design of Experiments (DoE) and pilot-scale data to get the process right. 

    Stage 2: Process Qualification

    Here, you validate your equipment and your operators. Then there is Process Performance Qualification (PPQ). In this, you have to run the process under predefined conditions, mainly three times successfully in a row.

    Stage 3: Continued Process Verification

    Then there is continuous verification. Here, the validation doesn’t stop once the PPQ is done. Instead, every single batch becomes part of an ongoing data stream.

    By regularly monitoring potency, dissolution, or bioburden, you can figure out small shifts early, before they turn into problems. 

    Stage 3 keeps your process healthy. Its goal is to find small issues before they become big problems.

    ParameterControl LimitCurrent MeanStatus
    Potency (%)95–105100 ± 2Stable
    Dissolution (%)≥ 80 in 30 min81 → 78Trend watch
    Bioburden (CFU/mL)≤ 104 → 5Stable

    4. Best Practices for Sustainable Compliance

    Focus AreaBest PracticeWhy It Matters
    Validation Master Plan (VMP)Define scope, ownership, and timelinesKeeps teams aligned and audit-ready
    Risk-Based FocusPrioritize high-impact process stepsAligns with ICH Q9, reduces over-testing
    Robust ProtocolsPredefine limits, include worst-case runsAvoids ambiguity during PPQ
    Cleaning ValidationChallenge with the hardest-to-clean residuesPrevents cross-contamination events
    Data IntegrityReal-time recording, secure audit trailsBuilds regulator confidence
    QA OversightQA approval at each lifecycle stageEnsures independence and compliance

    In 1988, unvalidated cleaning of reused drums led to pesticide contamination in cholestyramine resin. It is a recall that reshaped cleaning validation standards worldwide.

    5. Common Pitfalls and How to Avoid Them

    PitfallImpactPrevention Strategy
    Rushing PPQ without process understandingVariability, failed batchesPerform full DoE and risk analysis first
    Skipping CPVUndetected driftEstablish trending and alert limits
    Vague criteriaData ambiguityUse numeric, statistically justified limits
    Weak change controlLoss of validated stateReview and re-validate post-changes
    Poor documentationAudit findings, compliance riskFollow GDP, perform internal mock audits

    6. Documentation and Audit Readiness

    When you complete all the steps together, a complete process validation package shows how everything was done from start to end. It’s evidence that your entire system is under control.

    It includes:

    1. Validation Master Plan (VMP)
    2. Risk assessment and design data
    3. PPQ protocols, raw data, and reports
    4. CPV summaries and CAPA logs
    5. Change-control and re-validation records

    Conclusion

    Process validation is not just a regulatory requirement you have to follow. It is quite essential to keep the pharmaceutical quality good every day. It is a process that makes sure every pill and every vial is prepared and works the way it is supposed to.

    All you have to do is bring together good science and ongoing verification. This will lead to a good quality process and end products. Good end products mean good value, and they will create trust with the customers. 

    When you follow the whole process correctly, you will create a system that delivers safe and effective medicines every single time. 

    At the end of the day, process validation turns compliance into confidence. It changes regulations from something you have to do into something that keeps your products and your reputation up to the mark.